Campion Sail and Design
Apple construction photos
The design brief for the balanced lug rigged yawl version of the Apple:
To draw the largest traditional-looking day-sailer which could be built in a single car town garage. The finished hull of the Apple measured 15'10" oa by 5'3" over the gunwales. For those with limited time, means, but -above all - space, this design is well worth considering.

To draw the longest, deepest, widest hull possible, the planking for which would come out of a mere 4 sheets of 8' x 4' plywood through careful design and accurate nesting of the panel shapes, with one more sheet for the transom, semi-bulkhead, bulkhead and sunken fore-deck, and an additional one for the long centre case, thwarts and knees. Naturally, some of the sailing gear such as the rudder stock, possibly the rudder, perhaps some floor stiffeners might call for a 9mm sheet as they may do on any design, but the aim was to use as little decent ply as possible for the bare shell for the open boat version so that anyone who has already built one or two boats might have useful off-cuts for the various smaller shaped parts already available. The version with extensive built-in buoyancy clearly demands several more sheets, but the need for buoyancy bags is obviated. The open boat version is both lighter and more traditional in style. If well ballasted, this open version can be comfortably sailed singlehandedly in style without sitting out. On the other hand, the ballasted half-decked version with greatly reduced open cockpit space is more suitable for open water. Ballast can be lead pigs or sand bags or water in built-in tanks
To draw a shapely hull satisfying to the eye, with good step in stability; to have good heeled stability and manners for its type; to give a spirited sailing performance when raced against the local class racing dinghies; to easily accommodate up to 125kg of effective internal ballast for the single-hander who desires more the relaxed feel and ease of motion of a keelboat without the inconvenience of the keel; and to handle competently under oars.
To make the finished boat, including sailing gear, good-looking yet as inexpensive as possible, using simple stitch and glue techniques for the hull; the latter does not require a jig or fixed building base throughout the construction and so can be easily moved - essential if building in a restricted space.
To ensure that the hull is light enough to be man-handled, yet strong enough to help avoid puncture damage: the 6mm hull may be glass sheathed inside and out to increase strength, impact resistance and stiffness whilst ensuring an easily maintained surface.
Apple cutter photos courtesy of Erik Reinhard
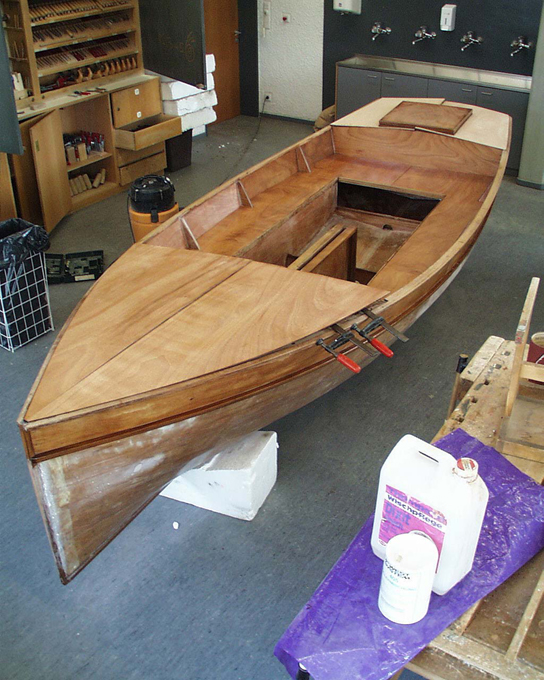
Proof of the pudding... cutting out and assembling this hull in a tight space proves the validity of the concept. Such exceptionally cramped working conditions are not, however, recommended!
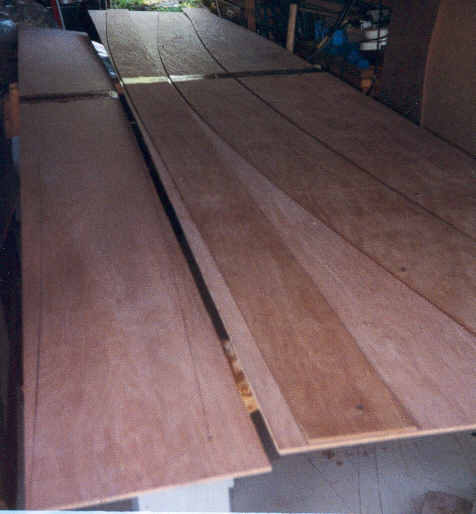
Layout of nested panels
The panels of the first side are used as templates to mark out the second. The topside panel to the left has been cut off though not cut out to its shape in order to free up some room.
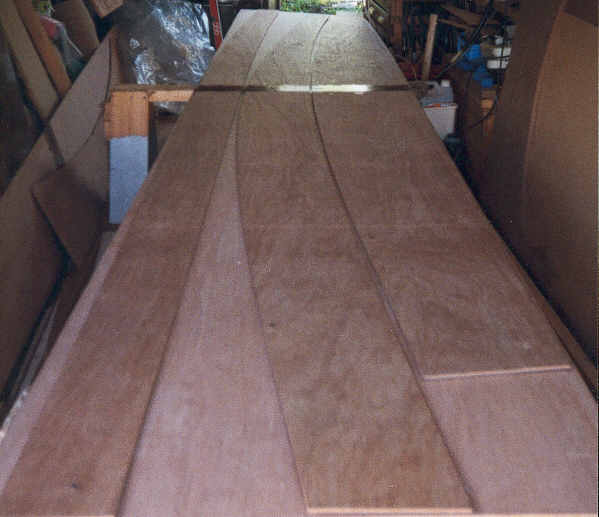
That's better!
The topside panels can be seen on the left. The hull panels are all carefully nested so that they can be cut from a mere four sheets of plywood.
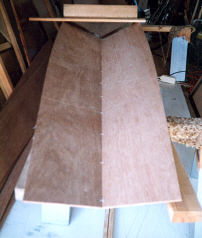
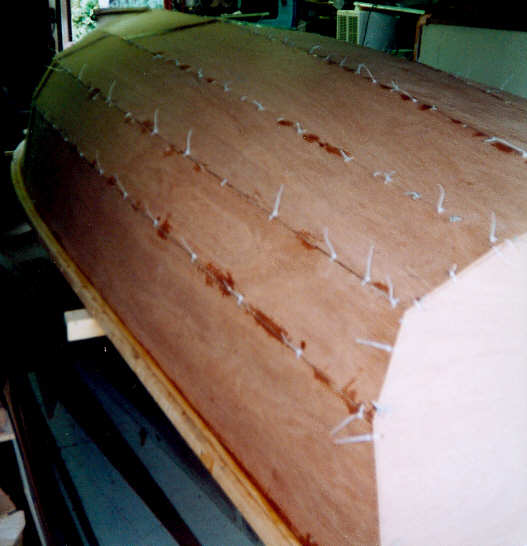
Now the exciting bit: the rapid assembly of the shell.
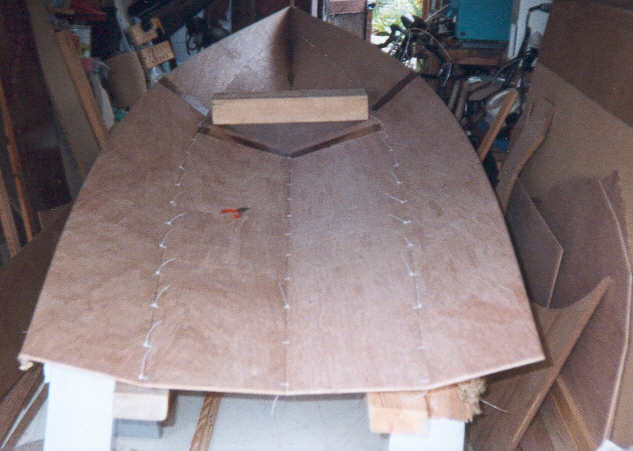
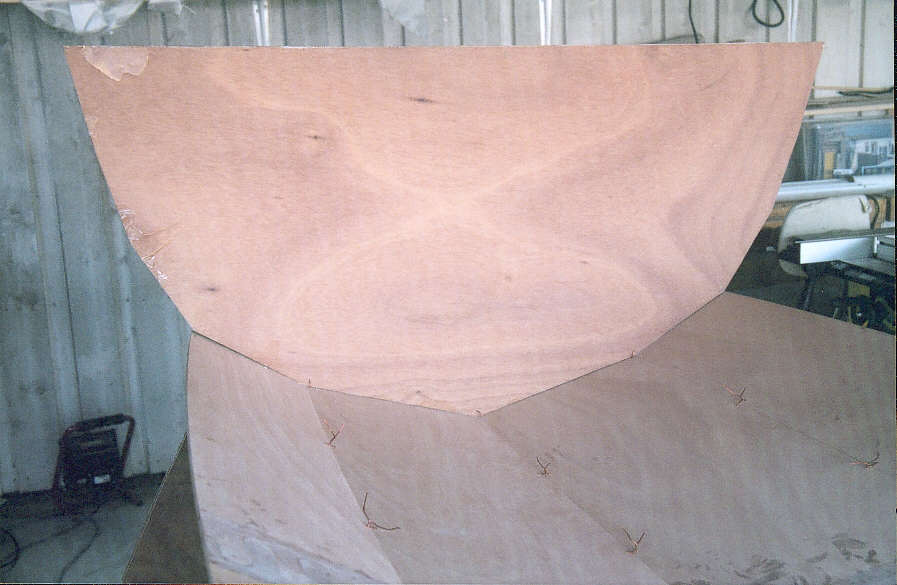
The panels are supported on two simple trestles and two of the 2 x 4's that will later be cut down for gunwales, etc. Stitching begins at the stem for the first two panels and at the stern working forward for the next two. Note here a lump of wood being used to encourage the bow panels to open out. The bulkheads and transom can be glimpsed on the right
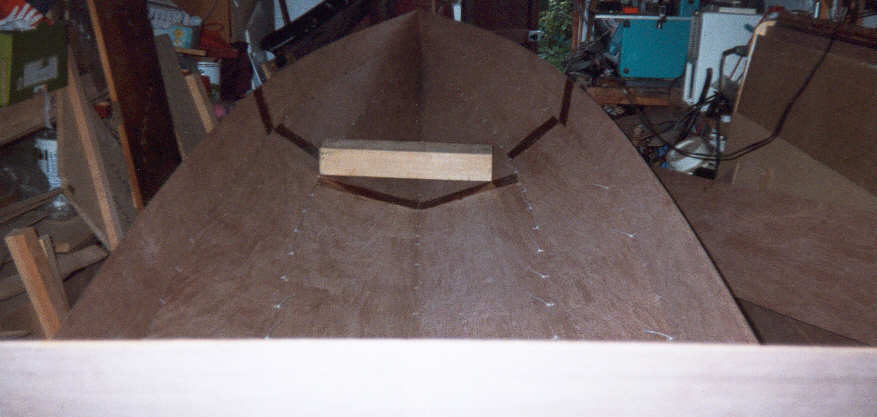
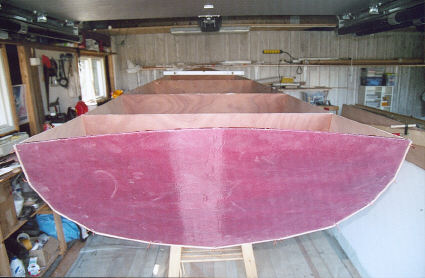
Third panel either side on, with the top of the transom - which has just been stitched on - visible at the bottom of the picture.
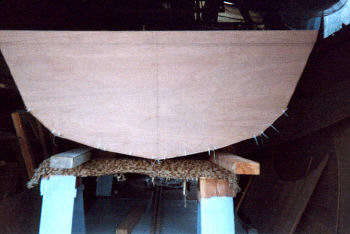
The view from the rear of the transom at the same stage. The topside panels have yet to be sewn on. The camber of the transom will be cut out later.
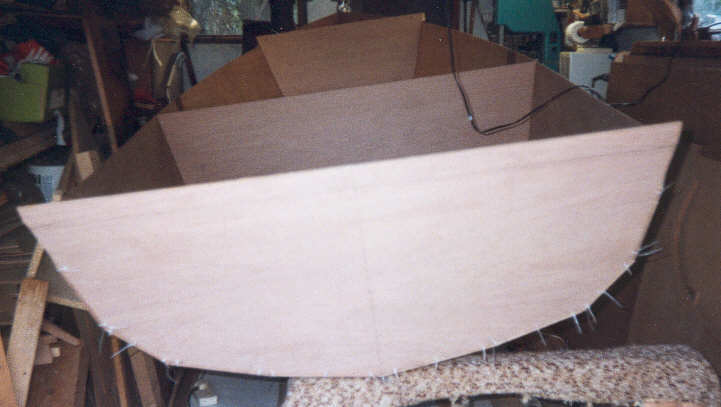
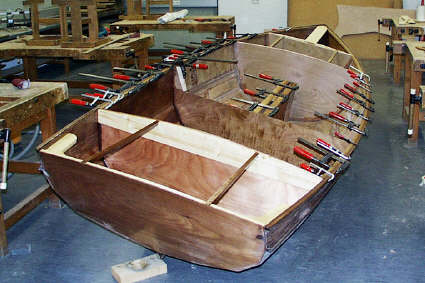
Bow and main bulkhead in, and the topsides on. Precious little room left! It took half a day to sew the panels together to form the shell. Hull weight at this stage is very light and so the shell is easily moved for access to one side or the other. Building on a conventional ladder frame and moulds would be virtually impossible in such a situation
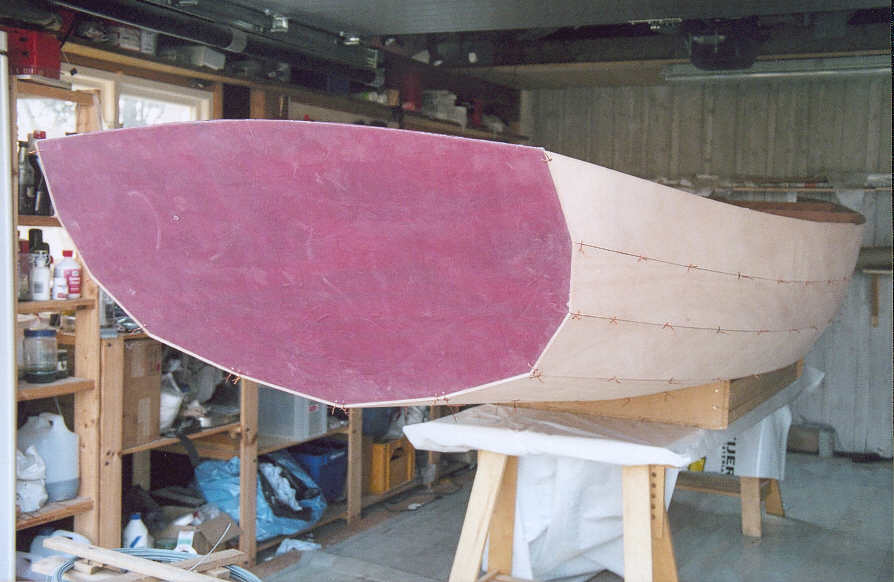
Inside seams have been tabbed together and the outer gunwales glued on prior to inverting and cleaning off. Traces of the 5 minute epoxy used on the outside seams to keep the alignment before any glassing was done on the inside can be seen on the planking. Such spot gluing is invaluable when the hull has to be bodily moved each time the opposite side is to be worked on as it prevents any misalignment prior to the taping of the inner seams.
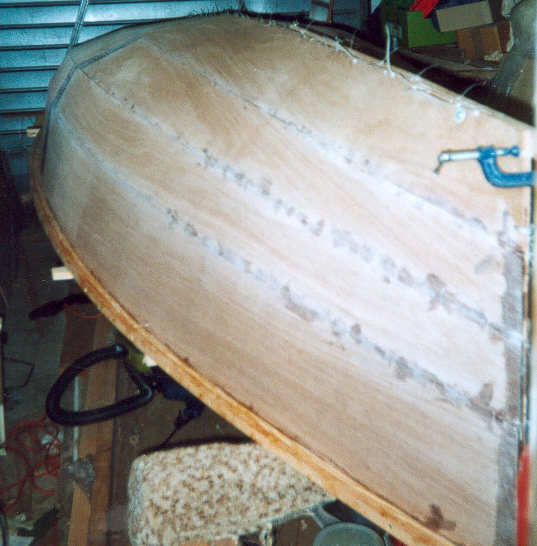
The plastic ties are being sliced off and the seams sanded prior to taping.
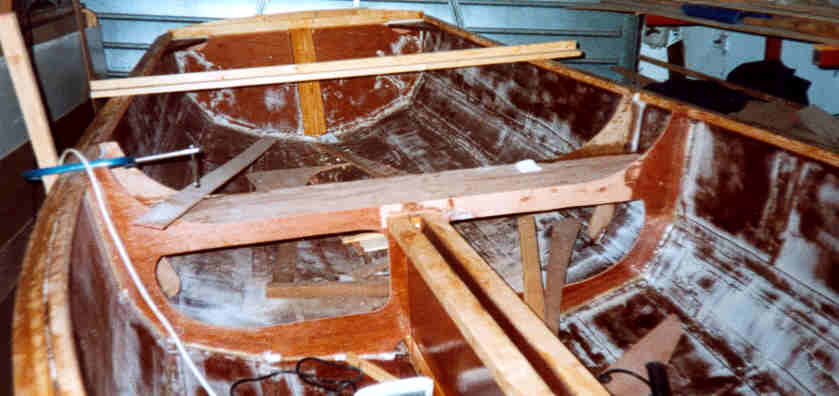
Work is surprisingly advanced here. The inner gunwale and the case have been fitted and the interior of the 3 ply hull has been glass-sheathed and the weave filled with white glass spheres prior to sanding. The exterior was not sheathed, the seams simply being taped and the hull epoxied. Single glass sheathing, incidentally, if used, goes on the opposite side of the ply to where the stress is to come from, not the same side: so to increase the puncture resistance of the hull to damage from rocks or to increase panel stiffness as well as improve punture resistance in the bow or where there are air tanks: or to hugely increase the strength of a self-draining cockpit floor, the glass sheathing goes on the inside and not the outside of the panel, a simple but important point which can easily be demonstrated with some thin scrap ply and glass cloth. Doing the opposite is inefficient and weak, and shows a lack of understanding as to how the materials can best complement each other. The internal glass sheathing of the planking goes almost as quickly as the initial internal seam taping which tends to be somewhat fiddly. Once the rear thwart goes in, with its long supporting knees (the main thwart rear knees, of a similar length, can be seen through the semi-bulkhead), the hull will be exceptionally rigid. Note the temporary cross-brace. This picture shows the main thwart behind the case, which is the layout I prefer, particularly for single-handing, but most people like a larger cockpit with the thwart moved forward; either way, the main bulkhead position remains unchanged. Note that the transom camber has been cut out and a pair of knees fitted.
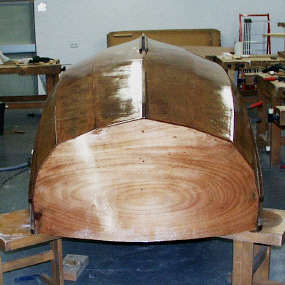

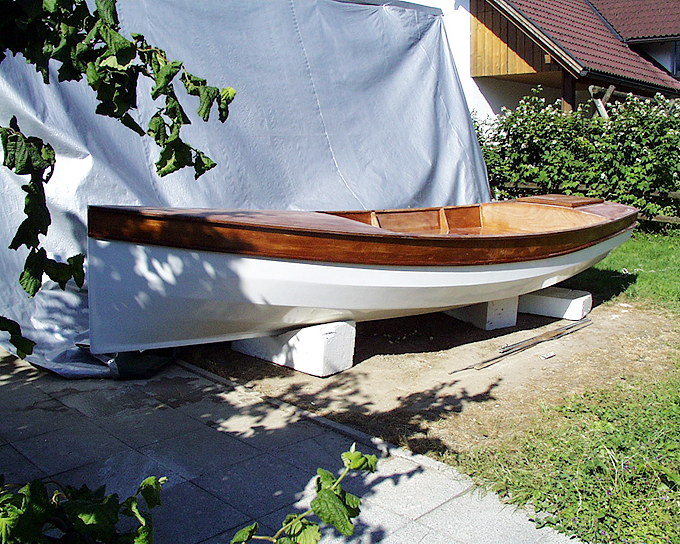
Peter Lord's 5 plank Apple lugger with his own customised internal layout and rig. This hull is one of a number of variations based on the original 4 planker, including one with greater flare to the topsides and 3 inches more beam
Photos above and below courtesy of P. Lord
Perfectly aligned, illustrating well the care and attention to detail of the builder. Note how the wide angle lens has removed all trace of the tumblehome at the transom.